Context Menus
Context menus are menus which open up under the mouse pointer and are therefore detached from the format graphical structure of the application. These menus provide an extra and convenient way to access Gnumeric commands. All of the commands in context menus are available through the regular menu system. Context menus provide different commands depending on the position of the pointer.
To activate a context menu, a user simply positions the pointer over the appropriate area and clicks one of the buttons on their mouse. Since this button is configurable and users have mice with different buttons, it may be a different button on any given machine or may even require the combination of a keyboard key and a mouse buttons. The user will have to find how to do this themselves.
Currently Gnumeric provides five different context menus. The context menu that is called in the central grid area is discussed next in Section 4.3.1 ― The Context Menu for the Cell Grid Area. The Context menu that appears when the pointer is over the row headers or column headers is presented in Section 4.3.2 ― The Context Menu for Column and Row Headers. Another context menu relates to the worksheet tabs and is explained in Section 4.3.3 ― Context Menu for Worksheet Tabs. Yet another context menu applies to embedded objects or shaped components such as a plot. These are shown in Section 4.3.4 ― The Context Menu for Embedded Objects and Components.
4.3.1. The Context Menu for the Cell Grid Area
The context menu in the cell grid area appears when the pointer is over the cell grid area. This menu applies to the cells that have been selected, not necessarily the cell underneath the mouse pointer.
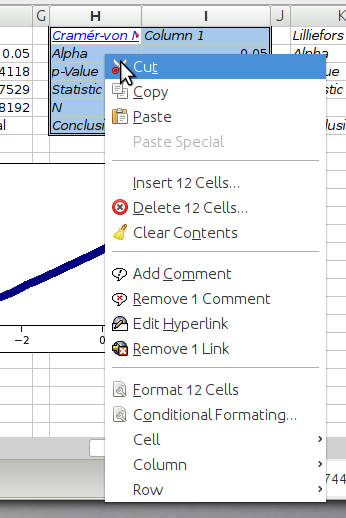
The grid context menu merely provides an extra way to access Gnumeric commands. The , , , , , , , , and commands are taken from the menu and its submenus and are explained in Section 4.2.4 ― Edit Menu. The and menu items are explained in the section on the menu in Section 4.2.6 ― Insert Menu. The , items as well as the items on the , , and submenus are explained in the manual section on the menu in Section 4.2.7 ― Format Menu.
4.3.2. The Context Menu for Column and Row Headers
The Context Menu for Column and Row Headers
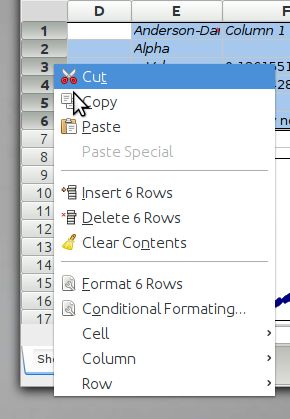
The context menu which relates to column or row headers is similar to the context menu for the grid area. Both insert and delete operations are modified to operate explicitly on rows or on columns.
4.3.3. Context Menu for Worksheet Tabs
The context menu for worksheet tabs provides access to functions that manipulate worksheets as a whole, rather than their contents.

The context menu for the worksheet tabs provides the same functions as the submenu of the menu. These functions are explained in Section 11.6.2 ― Worksheet Tab Context Menu. There are also two submenus where you can select one of the existing sheets, whether its tab is currently visible or not. The first submenu lists the sheets in their current order, the second submenu lists them alphabetically.
4.3.4. The Context Menu for Embedded Objects and Components
The Context Menu for Embedded Objects and Components.
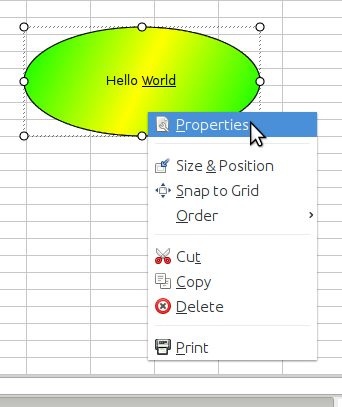
All embedded objects, such as drawing elements, graphs and images, have a context menu which can be invoked by placing the mouse pointer over the element and clicking with one of the secondary mouse buttons.
The first menu entry, labeled , will open a dialog specific to the type of element selected in which the user can configure the properties of the element.
The menu entry labeled , will open a dialog that permits the user to adjust the size and position of the embedded object.
The menu entry labeled , enlarges the object such that all of its corners are located at cell corners.
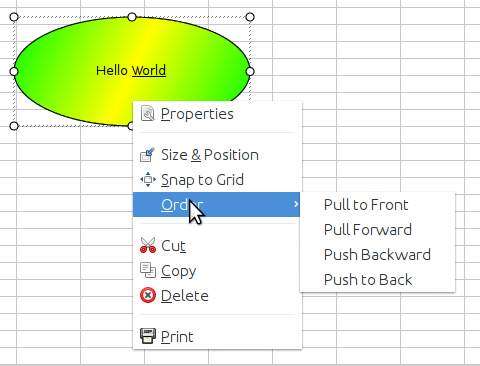
The menu entry labeled , opens a submenu which allows the user to change the visual order in which the graphical elements are placed. This order will affect the way in which the graphical elements obscure each other.
The menu entries labeled , , and , allow the user to operate on the whole object at once. The menu item allows the user to remove the element from its current position and then paste the object in a different location on the same sheet, in a different worksheet, in a different Gnumeric file, or in a file from a different program entirely. The menu item provides the same functionality while leaving the original item in place. The allows the user to remove the graphical element entirely.
The remaining menu item, , allows just the selected object to be printed.
For certain types of objects, a menu entry labeled allows the object to be saved as an image file. This menu item is not present in Figure 4-26 but is shown in Figure 4-28 .
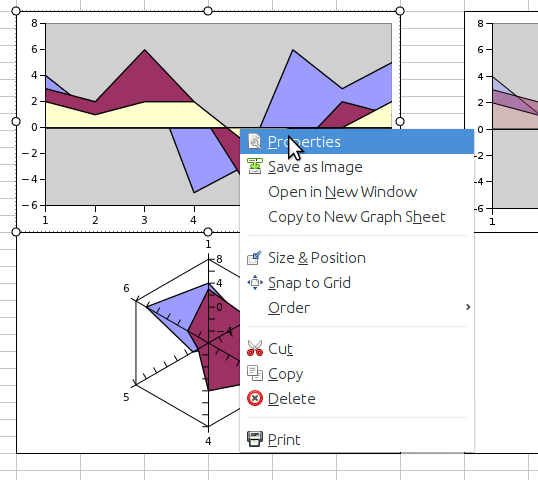
Graphs have a context menu that also contains menu entries labeled and . The menu item shows the graph by itself in a window. The copies the graph to a special sheet in the current workbook that contains only a single graph.
4.3.5. The Context Menu for Toolbars
The Context Menu for Toolbars

The context menu for toolbars allows the user to configure toolbars. Each toolbar can be displayed above the sheets, to the left of the sheets, or to the right of the sheets. The context menu can also be used to hide a toolbar. The toolbar can be made visible again via the submenu of the menu. See Section 4.2.5 ― View Menu.