Toolbars
The toolbars contain buttons and other elements which can be used to perform quickly some the more common operations. Each button has an icon intended to provide a mnemonic reminder of the operation performed by the button. The toolbar elements are intended to provide fast access to the commonly used tools. Almost all of these functions are also available through the menu system. The specific actions required to use each button vary.
Gnumeric has four toolbars, the standard toolbar, the format toolbar, the long format toolbar, and the object toolbar. The three toolbars are shown in Figure 4-30.

These toolbars will be discussed separately in the subsequent sections of this manual. User interaction with each toolbar happens in essentially the same way. Similarly, the toolbars can be configured in the same way. The next section explains the standard behavior of Gnumeric toolbars.
The long format toolbar contains all of the buttons of the format toolbar plus a few extra buttons, but in a different order. Users will usually choose only one of these toolbars to be displayed.
- 4.4.1. General Toolbar Behavior
- 4.4.2. The Standard Toolbar
- 4.4.3. The Format Toolbar
- 4.4.4. The Long Format Toolbar
- 4.4.5. The Object Toolbar
4.4.1. General Toolbar Behavior
The toolbar context menu described in Section 4.3.5 ― The Context Menu for Toolbars can be used to determine where each toolbar (above the sheets, to the left of the sheets, or to the right of the sheets) is displayed. The submenu of the menu (see Section 4.2.5 ― View Menu) can be used to determine which toolbars are visible.
If the Gnumeric window is too small to fit all of the toolbar buttons, Gnumeric displays an arrow to indicate that there are more options. If the user clicks on this arrow, a window will open with the remaining buttons as shown in Figure 4-31.
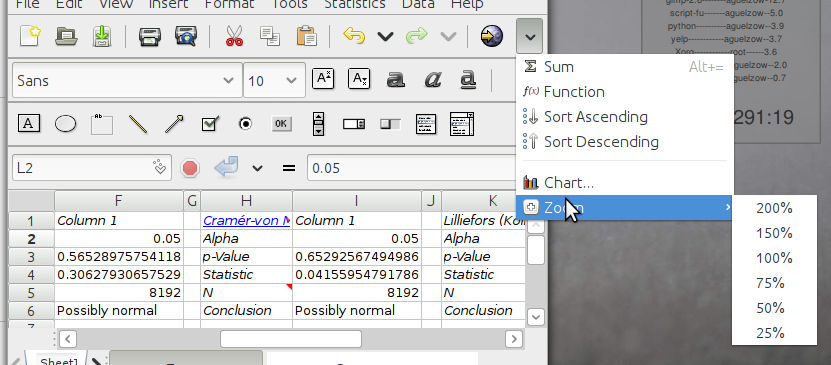
Certain toolbar options, such as the zoom box, are combinations of a button or text entry area and a downward pointing arrow. If the user clicks on the arrow, a list of available options appears.
4.4.2. The Standard Toolbar
The standard toolbar is shown in Figure 4-32.

The Standard Toolbar gives the user access to file operations, printing, movement of data blocks, the undo system, and to some of the powerful tools like the function creator and the graphing system.
-
 New File.
-
Create a new file.
-
 Open
Open
-
Open an existing file.
-
 Save
Save
-
Save the current worksheet to disk.
-
 Print
Print
-
Print the current worksheet or workbook to a file or a printer.
-
 Print Preview
-
Display a print preview of the current worksheet.
-
 Cut
Cut
-
Copy the cells in the current selection to the clipboard buffer and mark them to be deleted from the current position. The cells will only be removed if they are pasted into a new position.
-
 Copy
Copy
-
Copy the cells in the current selection to the clipboard buffer.
-
 Paste
Paste
-
Paste the contents of the clipboard buffer into the active cell.
-
 Undo
Undo
-
Undoes the last operation undertaken.
-
 Redo
Redo
-
This is the reverse of the undo operation, restoring its original state.
-
 Insert a hyperlink
-
This button opens a dialog to allow the user to define a hyperlink either internally within the spreadsheet or to an external resource such as a web page.
-
 Sum into the current cell
-
Starts a simple sum formula in the selected cell with Gnumeric simply waiting for a selection to be made to complete the sum. The user selects the destination cell, pushes this button, enters the range to be summed and pushes the confirm button (green arrow) in the data entry area or types the Return key.
-
 The function druid
-
This button will start a formula in the current cell using the function druid.
-
 Sort Ascending
-
Sorts the selected region in ascending order based on the first column selected.
-
 Sort Descending
-
Sorts the selected region in descending order based on the first column selected.
-
 Graph
Graph
-
This button calls the graph druid to create a graph.
-
 Zoom
Zoom
-
The zoom button allows the users to trade-off the extent of the worksheet which is visible against the size of the visible text and cells.
4.4.3. The Format Toolbar
The Format Toolbar

-
 Font Chooser.
-
The user can change the font of a selection either by typing the name of a new font in the text area of this box or by clicking on the little arrow to the right of the text area. This will cause a menu to appear from which a font can be chosen.
-
 Font size
-
The user can change the font size of a selection by typing the number of a different font size or by clicking on the little arrow to the right of the entry box and selecting the preferred size.
-
 Bold
Bold
-
Change the style of the current cell or the currently selected text to be bold, or unbold it if it is already bold.
-
 Italic
-
Change the style of the current cell or the currently selected text to be italicized.
-
 Underline
-
Change the style of the current cell or the currently selected text to be underlined.
-
 Left justify..
-
Justify the contents of the cell to the left of the cell.
-
 Center
-
Center the content of the cells.
-
 Right Justify
-
Justify the content of the cells to the right side of the cells
-
 Center across the selection
-
Center the content of the cells on the selected cells.
-
 Merge Cells
-
Merge the selected cells into a single cell.
-
 Split Merged Cells
-
Split previously merged cells into separate cells.
-
 Money
Money
-
Sets the format of the selected cells to be monetary.
-
 Percentage
-
Sets the format of the selected cells to be a percentage.
-
 Thousands separator
-
Sets the format of the selected cells to use thousands separator.
-
 Increase the displayed precision.
-
Increases the number of decimals shown in the currently selected cell.
-
 Decrease the displayed precision.
-
Decreases the number of decimals in the currently selected cell.
-
 Decrease the displayed indentation.
-
This button decreases the indentation of selected elements.
-
 Increase the displayed indentation.
-
This button increases the indentation of selected elements.
-
 Change the display borders.
-
This button and drop down menu can be used to set the borders of all the cells in the selection.
-
 Set the Background Colour.
-
This button and drop down menu can be used to set the back ground colour.
-
 Set the Text Colour
-
This can be used to change the colour of the text.
4.4.4. The Long Format Toolbar
The Long Format Toolbar

The Long Format Toolbar contains all buttons that the Format Toolbar (described in Section 4.4.3 ― The Format Toolbar) contains, except in a different order.
In addition, the Long Format Toolbar also contains the following buttons:
-
 Subscript
-
Change the style of the current cell or the currently selected text to be subscripted.
-
 Superscript
-
Change the style of the current cell or the currently selected text to be superscripted.
4.4.5. The Object Toolbar

The Object Toolbar.
-
 Box
Box
-
Insert a rectangular box containing optionally some text into the worksheet.
-
 Ellipse
-
Insert an ellipse or a circle into the worksheet.
-
 Insert a Frame.
-
This button allows a user to insert a frame into a worksheet.
-
 Line
Line
-
Draw a line on the worksheet.
-
 Arrow
Arrow
-
Draw a line with an arrow head at one end.
-
 Insert a Checkbox.
-
This button allows a user to insert a check box.
-
 Insert a radio button.
-
This button allows a user to insert a radio button.
-
 Insert a button.
-
This button allows a user to insert a button.
-
 Insert a Scrollbar.
-
This button allows a user to insert a scrollbar.
-
 Insert a Spinbutton Box.
-
This button allows a user to insert a spinbutton box.
-
 Insert a Slider.
-
This button allows a user to insert a slider.
-
 Insert a List.
-
This button allows a user to insert a list.
-
 Insert a Combo Box
-
This allows a user to insert a Combo Box.