Page Setup.
The Page Setup Dialog can be used to configure various options related to printing out a workbook. Click on to activate the Page Setup.
Remember that at any time you can click on the button to see what your document looks like with your selected options. See the Section 15.3 ― Print Preview
Normally the specified settings apply only to the current sheet. Select another sheet at the bottom of the Page Setup Dialog or select Apply to all sheets of this workbook. You can also save your adjustments by activating the save as default settings flag.
- 15.2.1. Page Setup Dialog - Page
- 15.2.2. Page Setup Dialog - Scale
- 15.2.3. Page Setup Dialog - Headers and Footers
- 15.2.4. Page Setup Dialog - Print Area
- 15.2.5. Page Setup Dialog - Sheet
15.2.1. Page Setup Dialog - Page
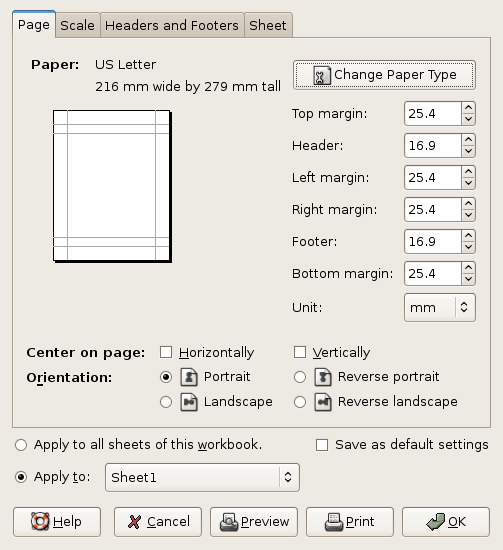
Change the paper type by clicking the button.
Select the preferred printer or choose Any Printer to see the formats supported by all printers. Pick a paper size and page orientation (portrait, landscape or reverse) to suit the best layout for your document.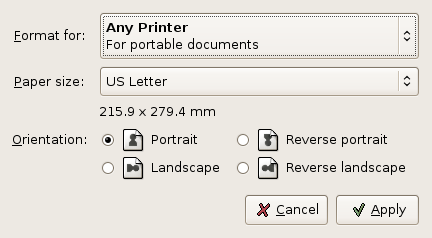
Specify the required margins of the page. Nothing will be printed inside these margins, not even page numbers. The margins will be measured in the same units (millimetres, points or inches) as the paper size. Change the unit in the paper and layout section to best fit your needs. You may also specify whether the page is centered horizontally and/or vertically on the printable part of the page.
15.2.2. Page Setup Dialog - Scale

Select the scale applied while printing. You can choose between no scaling, a fixed scaling or automatic scaling to fit the workbook to a defined number of paper sheets.
15.2.3. Page Setup Dialog - Headers and Footers
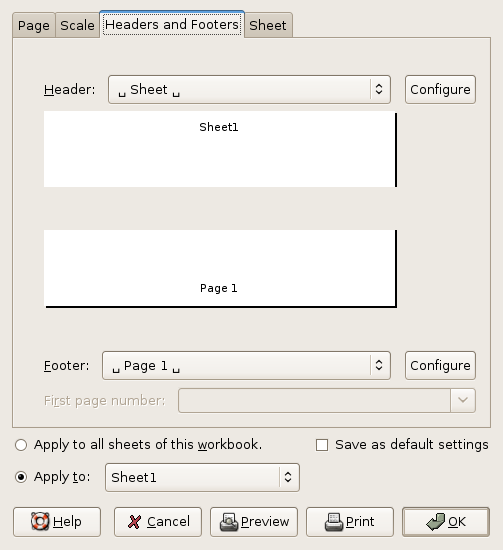
Select a predefined format for either the header or the footer. You can define an header or a footer by clicking the button next to the according drop-down field.
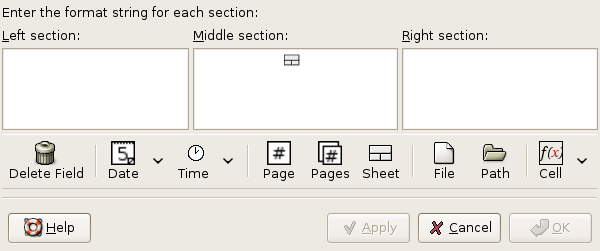
Headers and footers are divided into left, center and right area. Select the area you want to change. Insert a user-defined text or just select one or several of the given options. When selecting and/or you may choose the format by clicking on the arrow next to the symbol and click on the preferred option. Beside the according number, the number of total and the name of the according worksheet, you may also insert the name and/or . Finally you can select a defined to appear in the header/footer. Additionally there are a number of special opcodes for common options. These are:
- &[TAB]
-
Name of the worksheet.
- &[PAGE]
-
Page number in the printing.
- &[PAGES]
-
Total number of pages in the printout.
- &[DATE]
-
Current date in format dd-mmm-yyyy. The format can be changed by specifying the desired format in the opcode: &[DATE:yyyy/mm/dd].
- &[TIME]
-
Current time in format hh:mm. The format can be changed by specifying the desired format in the opcode: &[TIME:hh:mm:ss].
- &[FILE]
-
The basename of the file. For the file /home/jdoe/file.gnumeric, this opcode prints file.gnumeric.
- &[PATH]
-
The path of the file excluding the basename. For the file /home/jdoe/file.gnumeric, this opcode prints /home/jdoe/.
- &[CELL:$A$1]
-
The content of the cell $A$1 on the sheet being printed. Instead of $A$1 any other absolutely addressed cell may be used.
- &[CELL:A1]
-
The content of the top left cell on the current page. Instead of A1 any other relative cell address may be used. This relative address is interpreted with respect to the top left cell on the current page. Any repeating rows or columns are ignored.
- &[CELL:rep|A1]
-
The content of the top left cell on the current page. Instead of A1 any other relative cell address may be used. This relative address is interpreted with respect to the top left cell on the current page. Repeating rows or columns are not ignored. So if the top left cell is in a repeating row or column then the relative address is interpreted with respect to that cell.
You can choose the font in which the header and footer is printed by selecting a default header/footer font in the preferences (see in Section 13.2 ― General Preferences).
Double clicking on the header or footer preview will quickly allow you to customize that header or footer.
15.2.4. Page Setup Dialog - Print Area
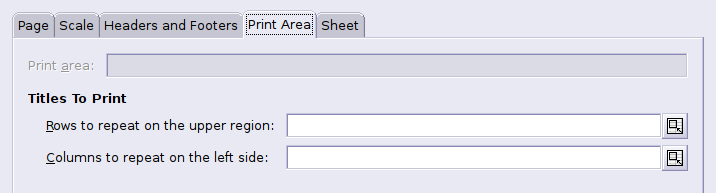
You can select rows or columns to be printed on every page of the output. This is commonly used for printing column or row names. To enable this, enter the range of cells to be repeated in Rows to repeat... or Columns to repeat... field. Instead of entering them manually, you can also select columns or rows to be repeated using the mouse.
Note that the rows and columns must be entered as ranges. That is, if you want to have first row repeated, you must enter 1:1, not just 1. Similarly, to have column A repeated, you must enter A:A.
15.2.5. Page Setup Dialog - Sheet
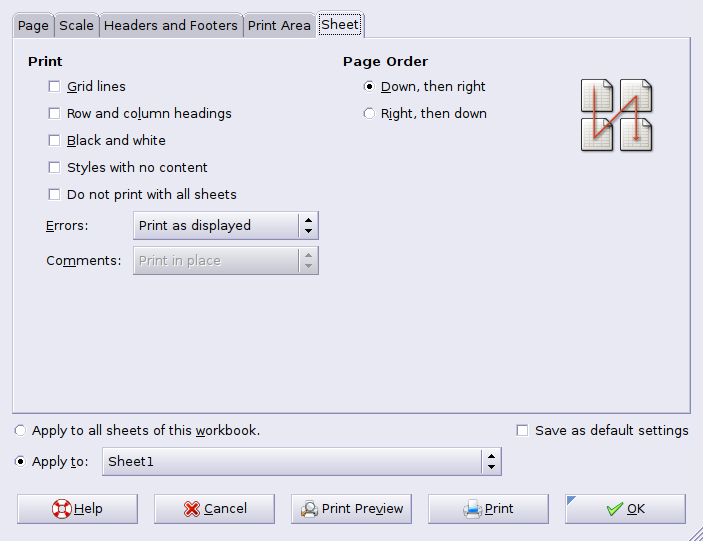
Select Grid lines to print the cell grid lines with your document. Unselect the button to hide the grid lines from your print output.
Select Black and white to convert the colours in your document to a greyscale range.
Select Do not print with all sheets if you want to avoid printing this sheet whenever you choose to print all sheets. If this item is checked then this sheet will only be printed as the active sheet or as part of a range of sheets. This is useful if you have a non-hidden sheet that contains only auxillary information and should normally not be printed.
Select Row and column headings to print the row and column headings (1,2,3,... and A,B,C,...).
Select Styles with no content to ensure cells with style changes will be printed, even if they are empty. For example, if you have a number of cells with the background color changed but no data in them, you can select this option to ensure they are in the printed output.
The Errors selection box allows you to choose how to print error values:
- Print as displayed
-
Every error value is printed just as shown on the worksheet.
- Print as spaces
-
No error values are printed.
- Print as dashes
-
Every error value is replaced by two m-dashes (separated by a thin space): "— —".
- Print as NA
-
Every error value is printed as an #N/A error.
Finally you can decide about the direction in which the workbook will be printed (Down, then right or Right, then down).