Drawing Elements
A Gnumeric worksheet can contain graphical elements which are simple drawing shapes.
This implementation of the drawing objects is temporary and will eventually be replaced by a more complete implementation including more types of drawing objects and based on scalable vector graphics (SVG) format graphical elements.
Each of these elements can be added by selecting the appropriate icon on the object toolbar and using the thin cross-hair mouse pointer to place the element on the worksheet by clicking or by click-dragging with the primary mouse button. This process is explained in greater detail in Section 9.1.1 ― Adding Graphical Elements.
Each of these elements can be configured using the context menu and its menu item, as explained in Section 9.1.5 ― Modifying Graphical Elements.
Each of these elements can be moved and resized on the worksheet, as explained in Section 9.1.3 ― Moving and Resizing Graphical Elements.
The stacking order, from the front to the back, which determines which widgets obscure each other, can be changed using the entries in the context menu, as explained in Section 9.1.7 ― Restacking Graphical Elements. However, as explained in the note above, the widgets do not currently stack under the other graphical elements.
Each of these elements can be deleted using the context menu and its menu item, as explained in Section 9.1.8 ― Deleting Graphical Elements.
- 9.4.1. Drawing Lines.
- 9.4.2. Drawing Arrows.
- 9.4.3. Drawing Rectangles.
- 9.4.4. Drawing Ovals.
9.4.1. Drawing Lines.
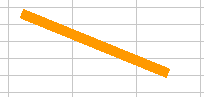
Lines are simple drawing elements which can be added to a worksheet. Figure 9-20 shows a wide orange line element placed above the worksheet grid.
9.4.1.1. Configuring the properties of the line
The properties of the line can be altered with the menu item in the context menu which appears when the mouse cursor is placed over the line and one of the secondary mouse buttons is pressed.
Lines have two properties, the color used for the line and the width of the line.
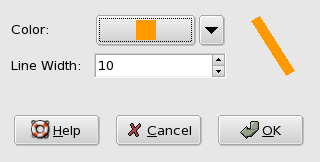
The color of the line can be altered by moving the mouse pointer over the button with the icon of a small, black, downward pointing arrow and then clicking with the primary mouse button. This will open up a panel with a number of standard colors presented as small squares. Any of these colors can be selected by moving the mouse pointer over the desired color and pressing once with the primary mouse button. Alternatively, a custom color can be chosen by clicking on the button at the bottom of the panel. This will open up the color chooser dialog. In this dialog colors can be defined using the numeric boxes or can be selected using the color triangle. The color can be selected by Clicking on the outer circle while the darkness or lightness can be selected by clicking inside the triangle. Once the desired color has been configured, this color can be used for the label outline by clicking on the button.
The line width can be changed either by typing a new number into the text box or by using the up and down arrows to increment or decrement the width number.
9.4.2. Drawing Arrows.
Arrows are elements that can be used to point to values in a worksheet. Figure 9-22 shows a purple arrow floating over a worksheet
9.4.2.1. Configuring the properties of the arrow
The properties of the arrow can be altered with the menu item in the context menu which appears when the mouse cursor is placed over the arrow and one of the secondary mouse buttons is pressed.
Arrows have five properties, the arrow color, the width of the line stem of the arrow, and tree dimensions for the arrow point which will be explained below.
The dimensions of related to the arrow are presented in Figure 9-24.

The 'Arrow Tip' is the distance from the point of the arrow to the base of the arrowhead where the shaft begins. The 'Arrow Length' is the distance from the arrow point to either of the outer side points of the arrow head, projected along the shaft of the arrow. The 'Arrow Width' is the distance between the two outer side points of the arrow head.
9.4.3. Drawing Rectangles.
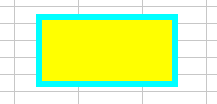
Rectangles are areal drawing elements. Figure 9-25 shows a yellow rectangle with a blue border.
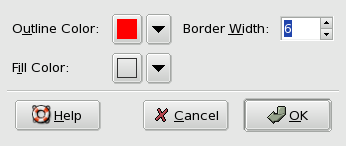
Rectangles have three properties which can be configured, the color and width of the border and the color of the interior of the rectangle.
9.4.3.1. Configuring the properties of the rectangle
The properties of the rectangle can be altered with the menu item in the context menu which appears when the mouse cursor is placed over the rectangle and one of the secondary mouse buttons is pressed.
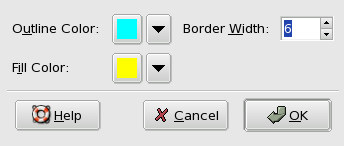
The color of the outline border can be configured by selecting a new color from the color picker as was explained in Section 9.4.1 ― Drawing Lines. for the line drawing element. The width of the border can be configured by typing a new dimension in the text box or by clicking on the increment arrows, up to increase the width and down to decrease the width. The color of the interior of the rectangle, the 'fill' color, can be configured in the same way as the color of the outline border.
9.4.4. Drawing Ovals.
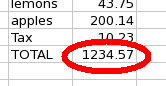
Ovals are areal drawing elements. Figure 9-27 shows a red oval with a transparent background, which is a useful way to circle important ranges in a workbook.
Ovals, like rectangles, can be configured in the color and width of the outline border, and the color of the fill.
9.4.4.1. Configuring the properties of the oval
The properties of the oval can be altered with the menu item in the context menu which appears when the mouse cursor is placed over the oval and one of the secondary mouse buttons is pressed.
The configuration of these properties is the same as the configuration of the rectangle properties explained above.